A Step-by-Step Guide to Growing Dill from Cuttings
Introduction
Dill is a popular herb with a distinct anise-like flavor that can add incredible depth to everything from sauces to salads. It tastes great and is incredibly easy to grow in the right conditions. This means anyone can reap its flavorful benefits. Growing dill from cuttings offers a few unique benefits over starting from seed.
Can you grow dill from cuttings? For starters, propagate dill from cuttings much quicker than if you were to start from seed. You don’t have to wait for weeks for seeds to germinate and sprout. Instead, you can create new plants almost instantly. Plus, with fewer chances of disease or insect infestations compared to seeds, your plants will be off to a strong and healthy start.
Your dill cuttings should start to show signs of new growth within 2-3 weeks, when you’ll see roots appearing at the base of your plants. You should transplant them into individual pots if the original container doesn't have enough space. With proper care and just a little bit of patience, you can expect a bountiful crop of fresh dill.
Understanding Dill and Its Varieties
An overview of dill's characteristics: Dill has light green feathery leaves and yellow flowers that grow in clusters. Its aroma has a unique spicy taste and a touch of sweetness. This makes it popular for use in food seasoning and salad dressings. Dill also produces edible seeds which have a mild taste, making them perfect for pickling.
The different varieties of dill: Home gardeners can choose dill from several varieties. The most common type is the Bouquet dill, which has a sharper flavor. The Long Island Mammoth dill has broad leaves and is easy to grow. There's also the Fernleaf dill which produces small but flavorful seeds, as well as the Dukat dill which produces abundant foliage with a mild flavor.
The benefits of growing dill in your herb garden: Dill can be used fresh or dried for culinary purposes, making it highly versatile in the kitchen. Plus, it's an effective companion plant for other vegetables like tomatoes and cabbage since it attracts beneficial insects that help keep harmful bugs away from your garden produce. In addition, its attractive foliage adds texture and visual interest to any herb garden.

Preparing the Right Tools and Materials
Plant dill from cutting is a great way to add some freshness and flavor to your garden. You should have the right tools and materials ready before starting.
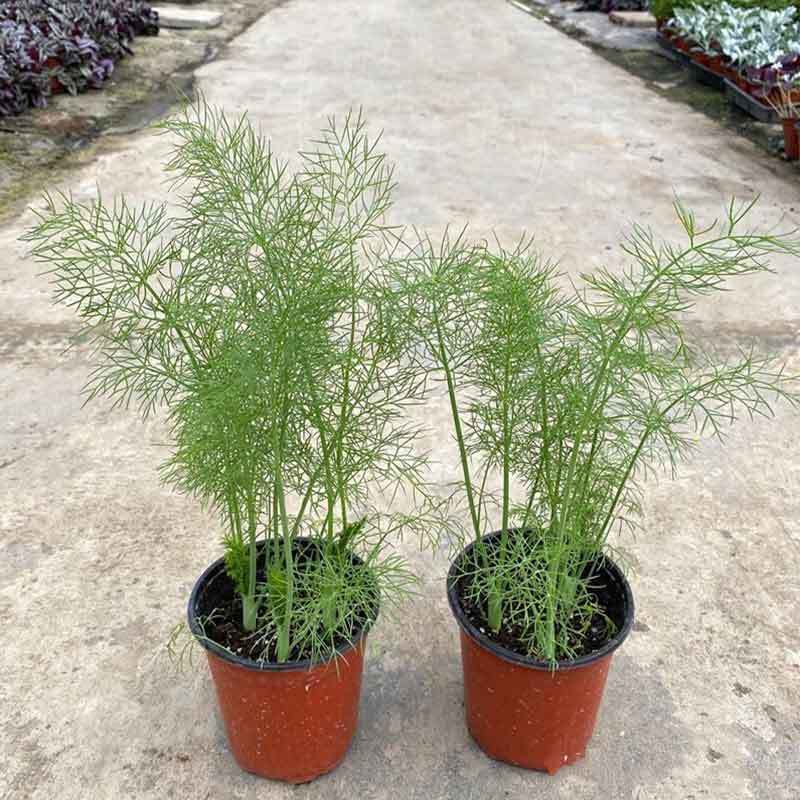
The essential tools required for growing dill from cuttings: When planting dill from cuttings, the most important tool is sharp scissors or shears. You should also have a container and some damp soil mix or potting soil. The container must have drainage holes. So the plants don’t become waterlogged. You can place the cuttings directly into the nursery plant pots after you take off the parent plant.
The ideal soil composition and pH levels for dill plants: You can use a loose, well-draining soil with a neutral or slightly acidic pH level. This will help the cuttings to take root and grow into healthy plants. You should use fresh potting mix. Don't expose it to moisture too often. Because this can cause your plants to root rot.
Selecting healthy dill cuttings: Choose cuttings with healthy leaves and no signs of discoloration or disease. The stem of the cutting should be free of any blemishes or damage. They are at least four inches in length. Cut your dill cuttings just below a leaf node on the stem. They should have enough stem attached to provide ample room for roots to form.
Propagation Techniques for Growing Dill from Cuttings
Taking dill cuttings from mature plants: This is a simple process that can help keep your herb garden growing with little effort. You should select a healthy and mature plant to take the cuttings from. You can use it to take clean, healthy cuttings of leaves from the parent plant without damaging them or leaving too much stem behind.
The ideal cutting should be between 5 and 10 centimeters long, taken from new growth at the end of the stem. You can use sharp scissors or shears to make clean cuts. This will not damage the parent plant. You should take several cuttings in case some do not root properly.
The preparation of the cuttings: You should prepare them before attempting to propagate them. To ensure successful growth, you should remove the lower leaves of the cutting. Prune off any flowers or buds that may still be present on the stem.
You should also clean your scissors or shears with rubbing alcohol before and after making each cut. Because this prevents bacterial contamination from spreading between plants.
The different propagation methods: Water propagation and soil propagation are two primary methods for propagating dill from cuttings. You should place the cuttings in a container and wait for roots to form.
Propagate dill in water is a great way for rooting dill cuttings quickly. You can use a container filled with lukewarm water. You will begin to see small roots forming at the base of each cutting in just a few days.
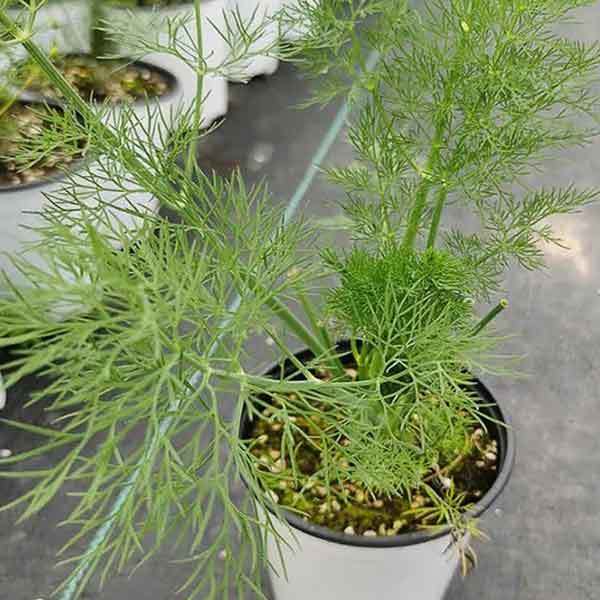
Soil propagation is another effective way to propagate dill from cuttings. It requires a bit more effort than water propagation. You can find a pot with good drainage to get started. You can use large plastic planter to accommodate all of your dill cuttings and fill it with a well-draining soil mixture.
Tips on maximizing success rates: Keep the container where you’ve placed your cuttings in a warm and humid place with indirect sunlight. Monitor the moisture level of the soil or water regularly. Give the soil a light misting with lukewarm water if it starts to dry out.
Some plants may take up to 6 weeks for roots to form. So don’t be too quick to move them outdoors or repot them. Once your dill has fully rooted, you can begin to enjoy homegrown harvests of this popular herb! With proper preparation and patience, it’s easy to successfully propagate dill from cuttings.
Creating an Ideal Growing Environment
Creating the right environment for growing dill cuttings is essential to ensure a successful harvest. Temperature and light requirements are key factors in creating an ideal environment.
The ideal conditions for dill cuttings: Placing the container in an area with direct sunlight will provide your dill plant with plenty of light, ensuring healthy growth. You can use artificial lighting if the place doesn't have direct sunlight. For example, full spectrum lights with high levels of UVB and UVA radiation.
The best temperature range for dill cuttings to thrive is between 65-75 degrees Fahrenheit. It’s important that the temperature of the growing area does not drop below 65°F, as this could lead to stunted growth or death of the cutting.
Selecting suitable containers and potting mix: When planting your dill cuttings, these plastic nursery pots should have drainage holes at the bottom. This will ensure adequate drainage and help prevent waterlogging.
A quality potting mix is also important for growing dill from cuttings. Look for a mix that contains peat moss, perlite, vermiculite or coconut coir as these ingredients provide air pockets to allow for better root growth.
The importance of proper drainage and moisture control: Proper moisture control is an important factor in successful dill cutting propagation. To avoid these issues, water your cutting deeply but infrequently, allowing the soil to dry out between waterings.
Too much moisture can lead to fungal diseases which can stunt or kill your plant. On the other hand, too little moisture can also be damaging as it can cause wilting and dehydration of the cutting.

How to Grow Dill from Cuttings?
How to propagate dill in pots? Planting dill cuttings in containers is a simple process that offers great rewards. When planting in a container, select one with drainage holes and fill it with potting soil. Dip each cutting in hormone rooting powder (optional). Then plant it into your soil mix about 2 inches deep.
Firm the soil around each cutting to ensure good contact with the stem. Keep it moist and this will help promote root development. You can start your dill cuttings in a sheltered spot with some filtered shade and plenty of fresh air circulation.
Keep an eye on the progress of your cuttings and be sure to water them regularly as they develop roots. In about three weeks’ time, you should see new growth appearing at the top of each cutting. This means your dill is ready to move into its permanent home.
Can you propagate dill in the ground? To plant directly in the garden, choose an area with well-draining soil and full sun exposure. Dig a shallow hole about 6 inches wide by 2 inches deep, place the cutting inside, then cover it lightly with soil. Water thoroughly after planting to encourage root growth.
How Do You Care for Dill Cuttings?
Instructions on watering and fertilizing: You should water your dill plants regularly to keep them healthy and robust. Dill requires at least 1 inch of water per week, so monitor the soil. Add more if it's too dry.
Fertilizing dill is not necessary but can help to promote growth. You can use a balanced organic fertilizer every two months or so. Adding mulch around the plants will also help conserve moisture in the soil and suppress weeds.
Common pests and diseases: Aphids and spider mites are common pests. Downy Mildew is a common disease. They may affect your dill plants. To prevent pests and diseases, practice crop rotation between different plant families. If you do spot any pests or diseases on your dill plants, treat them immediately with an appropriate pesticide or fungicide.
Tips for extending the harvesting season: Trimming dill plant to encourage healthy growth and extend your dill harvesting season. You should deadhead flowers as soon as they appear. This will help reduce the amount of seed being produced and keep plants in a productive state for longer.
When harvesting, pick just the leaves and avoid cutting stems unless absolutely necessary. Finally, when you’re done with your harvest, leave some of the foliage on the plants to provide them with energy reserves for future growth.
Harvesting and Utilizing Dill
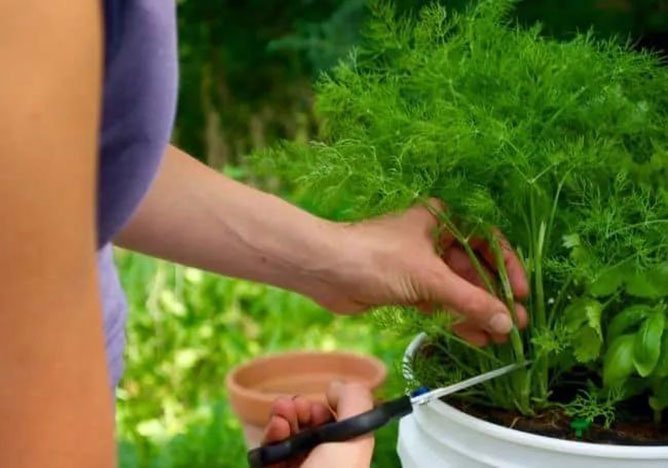
Proper harvesting techniques: When harvesting leaves, you should cut off the entire top of the plant just above where new growth appears to encourage regrowth and bushier plants. For both flowers and seeds, wait until they turn brown before harvesting. You can either pick individual flowers or shake them off into a container directly.
When picking or snipping off fresh dill, avoid taking too much of the stem above the leaves. This will ensure there are enough plants remaining for regrowth. If necessary, use scissors instead of your fingers to avoid damaging the plant when cutting off leaves. It's also important to choose only mature, healthy-looking stems. Because these are more likely to regrow than immature ones.
Harvesting often encourages new growth on the existing dill plants. Because their energy is redirected from producing seed heads into forming new leaves and stems. Harvest frequently and the dill continues to produce new leaves. This will also keep the plant bushier and provide more foliage for harvesting.
Utilizing dill in culinary recipes: Eating dill has many potential health benefits. The dill plants contain vitamins A, vitamins C, calcium, potassium, magnesium and iron. They have antioxidant properties that reduce inflammation and support your immune system.
It’s commonly used as a remedy for digestive problems due to its carminative effects. It can help soothe an upset stomach. Dill may also aid in respiratory issues with its antispasmodic qualities that help relax bronchial spasms.

Troubleshooting Common Issues
Troubleshooting tips and solutions for issues: Gardeners may encounter some common problems when growing dill from cuttings.
1. Yellowing leaves: The leaves turn yellow is the most common problem. It will cause yellow leaves if the soil lacks nutrients. So your soil should be enriched with organic matter such as compost or manure.
Also check if the pH balance in the soil is appropriate for dill growth. It should be slightly acidic between 6-7. Additionally, you can use fertilizers and nutrient-rich water. So the soil will have enough nutrients for your dill.
2. Fungal Infections: Another problem gardeners may face is fungal infections. Too much moisture or inadequate drainage in the soil may cause it. To remedy this situation, improve the drainage of the area by digging down several inches and incorporating organic matter into the soil.
Don't over-watering your dill plants. Instead, provide consistent but low levels of moisture throughout their growing season. You can use fungicides to protect against further infection.
3. Pests: Dill is particularly prone to attacks from pests such as aphids, caterpillars and slugs. To prevent this, regularly inspect the plants for signs of pests. You can use insecticides or natural solutions such as neem oil to eradicate them. You should also avoid leaving fallen leaves on the ground near your dill plants. Because these can attract pests.
Preventative Measures: You should take some preventive measures to ensure successful growth of dill from cuttings. The cuttings should be healthy and free from any disease or insects before planting them.
Choose a spot with sufficient sunlight and good drainage. Your dill plants will receive enough nutrients and moisture without becoming waterlogged. Lastly, use mulch around the base of your plants to retain moisture and keep weeds at bay.
Conclusion
In conclusion, creating a thriving herb garden is not difficult. Grow dill from a cutting is a rewarding experience that requires some care and attention. Growing dill from cuttings will give you access to fresh herbs all year round.
Creating the right environment for dill cutting is essential for success. Make sure you provide plenty of light, use a suitable container with adequate drainage, select a quality potting mix, and carefully monitor moisture levels to ensure healthy growth and a successful harvest!
If you follow these steps, you’ll be well on your way to creating an ideal growing environment for dill cuttings. With suitable light, container, potting mix and moisture levels, you can expect lush growth with plenty of fragrant leaves that will add flavor to any dish!
Propagate dill from cuttings may take some time and effort. But these efforts are very worthwhile. Take your time and practice patience throughout the process. You’ll be harvesting fresh dill before you know it!
You can find more guides like this in our Seed & Plant Propagation hub. It includes both growing plants from seed and propagating plants from cuttings.
Related Article:
why is my dill turning yellow
how to grow impatiens from cuttings
propagate milkweed from cutting


